Posts

Showing posts with the label DIY Projects

How to Make a Firecracker with Light Matches

Image
This is a YouTube video from MrGear that shows you how you can make a firecracker with light matches. The whole video actually shows you 4 awesome tricks with light matches, the last one is about how to make a firecracker out of them. Below is the video and if you have a slow connection, you can refer to the video screenshots below the video. 4 Awesome Tricks with Matches by MrGear Video Screenshots You will need a piece of paper. Cut the paper with a length that you want for the body of the firecracker. There are measurements in the video. Using a pen as a template for the tunnel size, roll the paper on top of the pen. Apply some glue at your first roll. Apply some glue at the whole of the paper. Roll the paper all the way to make a cylinder with the tunnel size of the pen used just a moment ago. Roll another piece of paper with a smaller tunnel size and shorter to be uaed as the plug at the bottom. Push it into the bottom of the paper roll. Use a glue gun to seal the bottom hole. Us...

A Simple Door Alarm Using a Clothes Peg

Image
This is a short YouTube video from DrScrew channel that shows you how you can make a simple door alarm with items lying around your house. Below is the video from their YouTube channel and if you have a slow connection, I have screenshot some of the important steps on how to make the alarm. How to make a simple door alarm by DrScrew Video Screenshots First, you will need a spare clothes peg like this one above. Then, you will need a glue gun. Using the glue gun, glue 2 AA batteries onto the peg, one on both side just like what is shown above. Drill a hole through the tip of the peg. Fix a small screw into the hole. Prepare your buzzer for soldering. You can use any buzzer you can find from your old mother board or old electronics appliances that have one. Glue the buzzer to the peg. Solder the buzzer wires to the tip and to the battery terminal. Solder a wire to connect the 2 batteries terminal. Please note the polarity of the battery. Solder the other tip with a wire and connect to t...

Adhesives or Glue Chart for your sticky moment

Image
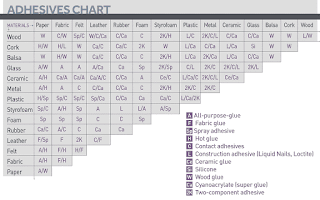
Click for larger version This is a handy chart to guide you on which adhesive or glue to use on different types of materials. Print this out and stick it to your garage wall. References, Sources and Credits: http://makezine.com/2016/03/25/dont-glue-anything-without-handy-reference-chart/

Make a negative film scanner from a shoe box

Image
This is how you can make a home made negative film scanner by using a shoebox and your digital camera. The basic idea here is to use your digital camera (campact, DSLR or even smarphone) to capture the negative to a digital image and use a photo editor to invert the negative image to color image. Before you go and pick up your digital camera and start snapping your old negative films, you will need a light box to illuminate your negative films, and a jig to properly hold your camera in place to avoid shaking when you snap the negative image. (via  jamsplay.com YouTube )

Make a vertical stand for your modem and router to save some table space

Image
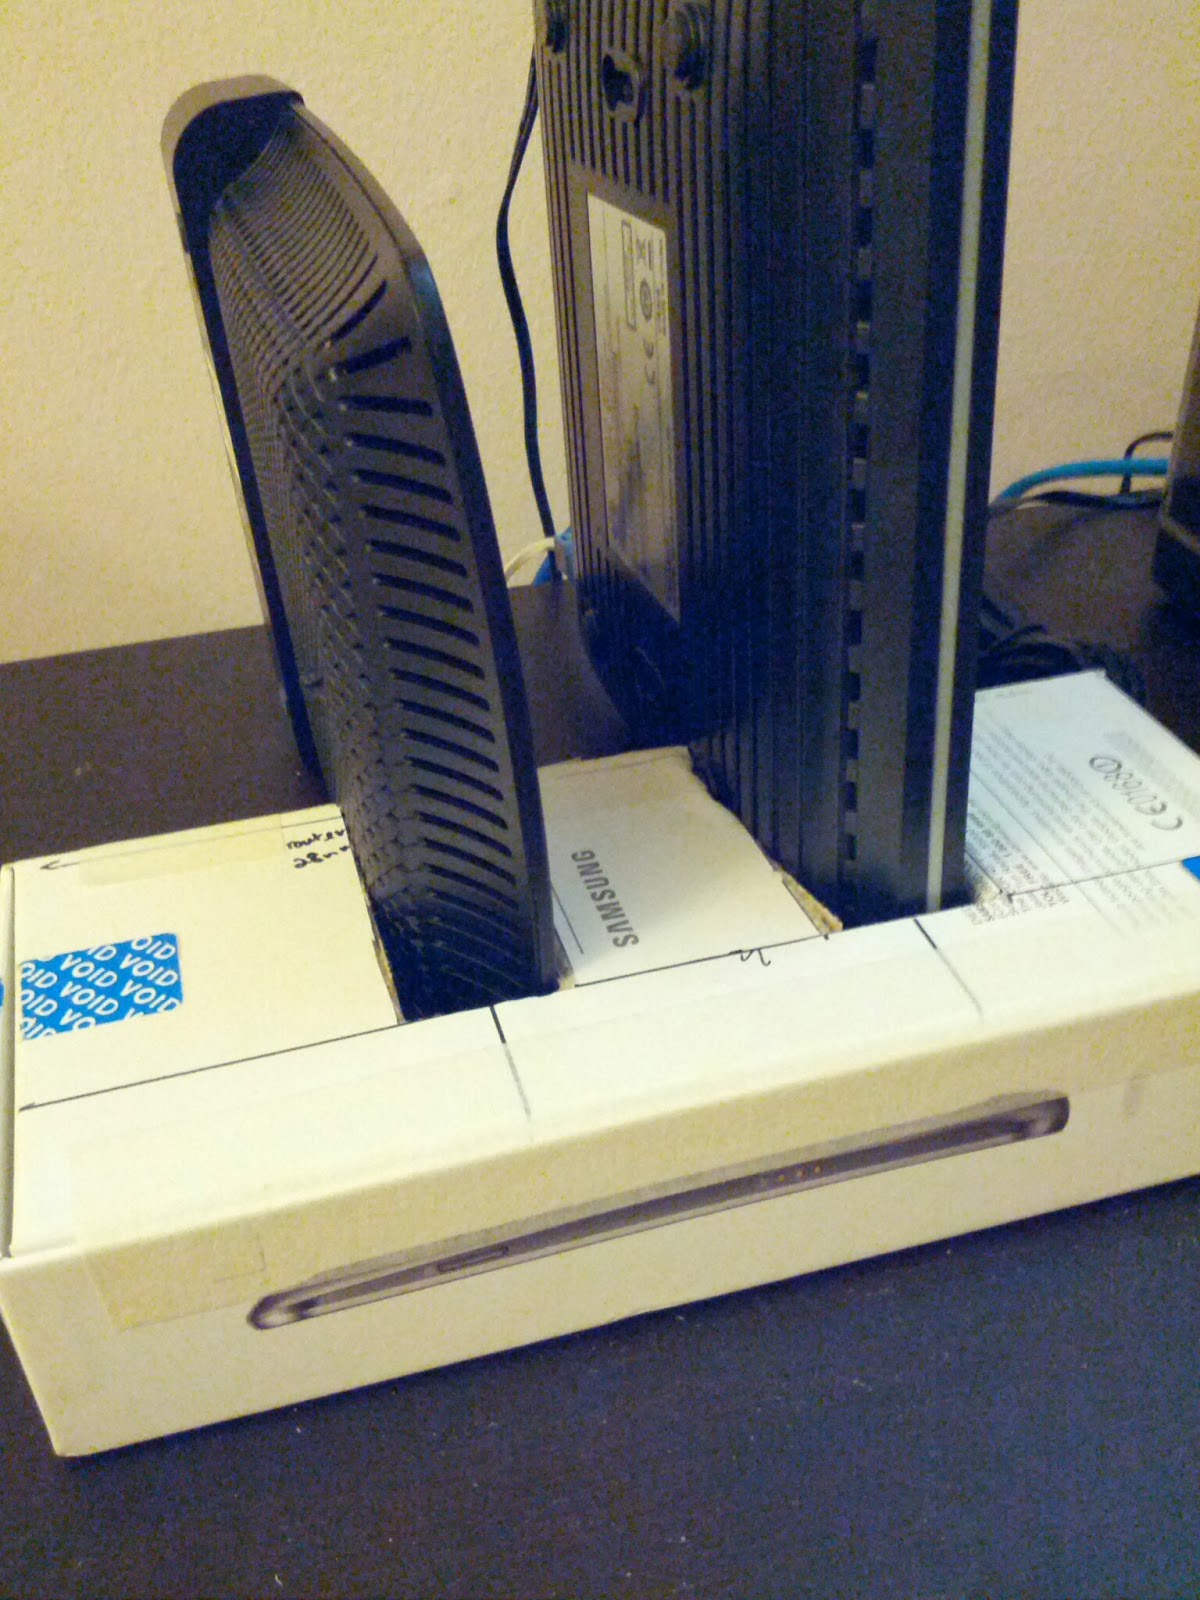
Since I bought my D-Link DNS-320L NAS filer, I was trying to find space on the table I placed my fiber modem and WiFi router together. With the addition of the NAS filer, the space of that table suddenly almost fully occupied. To save some space, I came with an idea if placing those modems and routers vertically to save one device space. I use my old Samsung Galaxy Nexus package box and cut out some opening to slot in those devices. A precision caliper and sharp penknife are the necessary tools to get the opening wide enough for the devices to slot in. I could make 3 slots on this box but since I only have 2, devices, this will do. The good thing about placing the devices in vertical is the devices has more surface exposing to the air and thus making a better cooling from the ambient wind in the room.

How to make a simple solar panel USB charger

Image
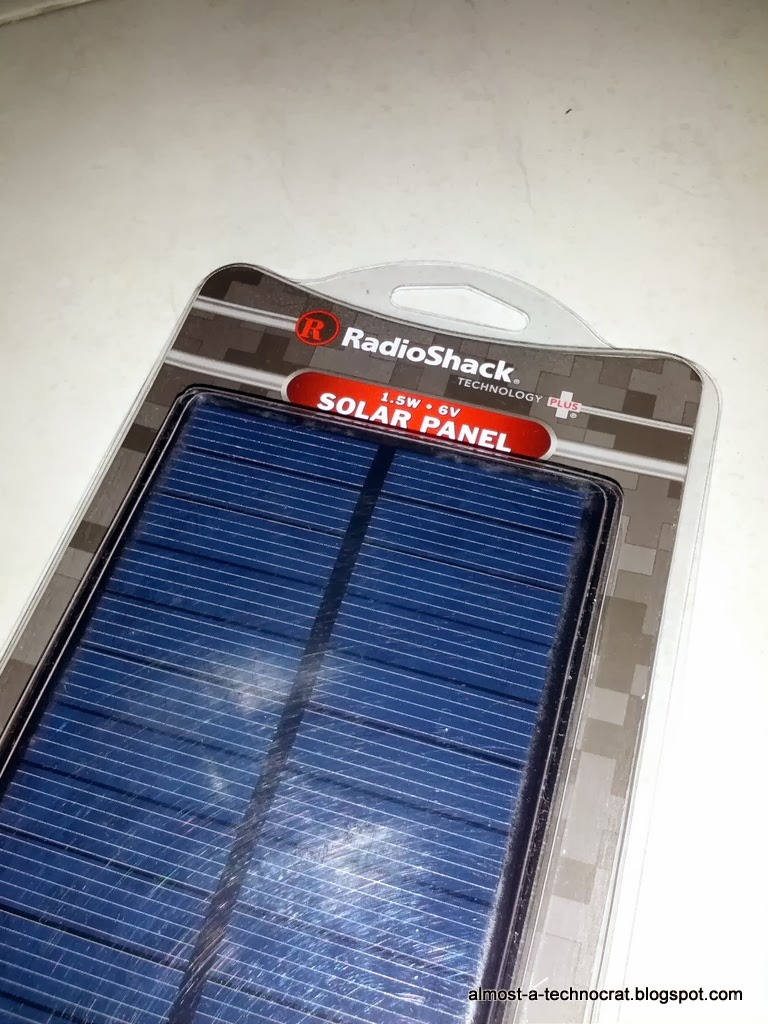
RadioShack 6V solar panel This is the most simplest way you can make a USB charger using a 6V solar panel. The finished product will be some what weather proof and requires no soldering at all. My solar panel was purchased from RadioShack with these specs: Typical power output : 1.5W Typical voltage output : 6V - 5% Typical current output : 250mA -5% Overall size : 129.8mm x 84.8mm x 3.2mm Because of the relatively small output current the solar panel can produce, it is recommended that this charger to be used to charge a power bank or a shut-down smartphone. If the charger is used to charge a power-up smartphone, the net current used for charging might not enough to charge the battery because the smartphone will consume most the the charging current. [25 NOV 2013] I conducted a simple experiment on how much the solar panel power will produce to fill up my 2600mAH power bank. For a full day of Sun, it fills up about a quarter of the power bank. I guess that's why commercial solar c...

The Making of Capillary Action Alcohol Stove

Image
Capillary action alcohol stove in action This is a simpler stove to make. There is no epoxy needed to seal parts like the Open Jet Alcohol Stove . All i need to do, were just marking, cutting and crimping the grooves for the capillaries. This type of stove uses the crimped grooves as capillary action for the alcohol vapors to escape through it.  When the stove is lighted, it takes about few seconds to heat up the stove and boil the alcohol inside. In no time the alcohol vapors escape through the crimped grooves and catches the fire from the center hole. Immediately it creates the vapor jet flames. From my initial observation, the jet flames from the capillaries(sides) are bigger compare to my previous Open Jet Alcohol Stove . I have not run any boiling tests with this stove so i don't have any numbers to analyze the efficiency of this type of stove. I have not prepare much detail steps in making this stove but if you interested, let me know. Below are some of my photo shots i took ...