 |
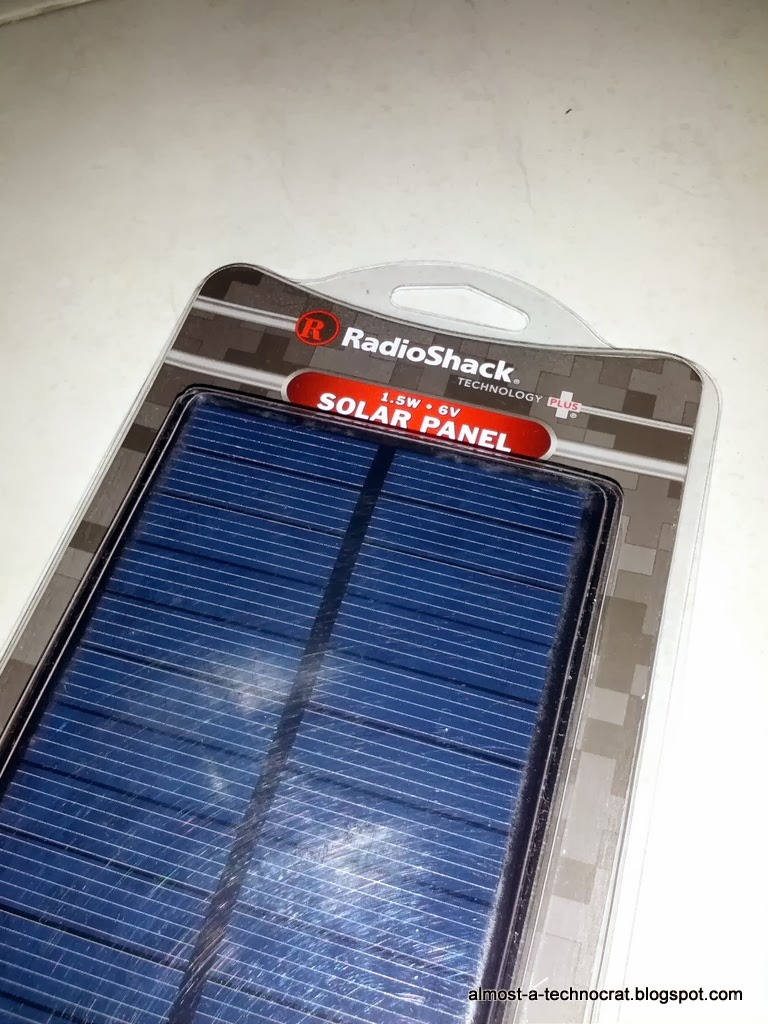
| RadioShack 6V solar panel |
This is the most simplest way you can make a USB charger using a 6V solar panel. The finished product will be some what weather proof and requires no soldering at all. My solar panel was purchased from RadioShack with these specs:
Typical power output : 1.5W
Typical voltage output : 6V - 5%
Typical current output : 250mA -5%
Overall size : 129.8mm x 84.8mm x 3.2mm
Because of the relatively small output current the solar panel can produce, it is recommended that this charger to be used to charge a power bank or a shut-down smartphone. If the charger is used to charge a power-up smartphone, the net current used for charging might not enough to charge the battery because the smartphone will consume most the the charging current.
[25 NOV 2013]I conducted a simple experiment on how much the solar panel power will produce to fill up my 2600mAH power bank. For a full day of Sun, it fills up about a quarter of the power bank. I guess that's why commercial solar charger for outdoor use include about four solar panels to get the right amount of power to be useful at the outdoors.
Bill of materials
- 6V RadioShack solar panel
- 1N4937 diode
- Wire connectors
- Old USB extension cable
- A short bypass wire
- Carabiner
Prepare the blocking diode
Because I am so lazy to dig out my soldering equipment for such a simple project, I decided to use screwed wire connectors. This is how it looks like:
 |
| Blocking diode to prevent the current back flow to solar panel |
The diode connection is for the red wires and the wire bypass is for the black wires. This blocking diode is to prevent back flow of current to the solar panel that will damage it.
Prepare the solar panel housing
Since RadioShack packed the solar panel with a nice plastic housing, I decided to use it as my solar panel housing and thus provided me with weather proof feature (some what).
- Wash the housing clean.
- Drill a small hole enough for a USB cable to go through at the bottom.
 |
| Hole at the bottom for the USB female connector cable |
Prepare the USB female connector
For the USB female connector, I used my old USB extension cable.
- Cut the USB extension cable into two and use the female connector part of it.
- Strip the cable and to pull out the wires for power connection.
 |
| USB extension cable cut into two |
 |
| Stripped wires for connection with the solar panel |
Assemble the solar panel USB charger
- Get the USB cable through the hole at the housing.
- Connect the red wires to the diode. Note the direction of the diode. The correct current direction is from solar panel to USB cable.
- Connect the black wires to the bypass.
- Put the solar panel and the description cardboard back into the housing.
 |
| USB cable going through the bottom hole |
 |
| Solar panel and the USB cable connected to the solar panel with a blocking diode and properly palced back into it's original housing |
 |
| The original description cardboard placed back into the housing |
Reasons that I used back the original housing for this project are:
- The housing is perfect for my use case. With a carabiner, I can hang it on my backpack or windows or anywhere there are sun light.
- It's some what weather proof to drops and little bit of rain.
- The original housing looks great too.


Thanks for writing this very useful information you have provided for me cheers!
ReplyDeleteI have read the post and the information which you have shared that is really good and useful.
ReplyDelete